NoNewSewMo Project 1: “Blue Bateau” V8789 1957

Hi lovelies!

Again later than promised (erk) I have for you a finished project! 

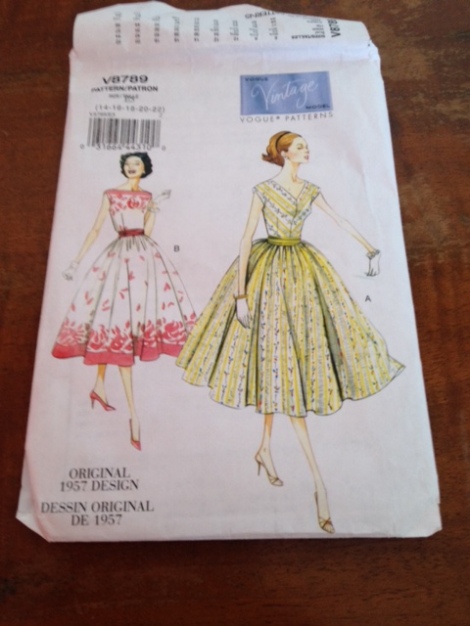
This is a Vogue Vintage reprint of pattern V8789. There were 2 styles included in this pattern; the one I’m showing to you tonight is  dress “B”. The pattern description reads “MISSES’ PETITE DRESS AND CUMMERBUND: Pullover dresses A, B have fitted bodice, skirt front and back cut-in-one, no right side seam and left side zipper. A: Bias bodice. B: Button and loop shoulder closing, dress cut on crosswise grain of fabric.” It is clearly a “New Look” style!

Image


Vogue Vintage Model Patterns V8789 (1957)


When I shopped for fabric for this dress I couldn’t find anything with a border print. It’s a shame, since I think the border print is really charming on the envelope sketch, but I had to shop within my means. I settled on a sweet and inoffensive quilting cotton in a blue floral print. 

The dress has been designed to be worn with a cummerbund. I don’t think they’re particularly practical so I’ve retained enough fabric to make a self-covered belt as soon as I can find some fabric belt kits. If you have a source, in Australia OR overseas, please do let me know!

As usual, I cut the pattern in some scrap fabric (actually an old bed sheet) and fitted a toile. It was so many months ago that I can’t find a photo even if I did take one; I’m sorry for that and I’ll be more careful to make sure I document these things more accurately in the future.

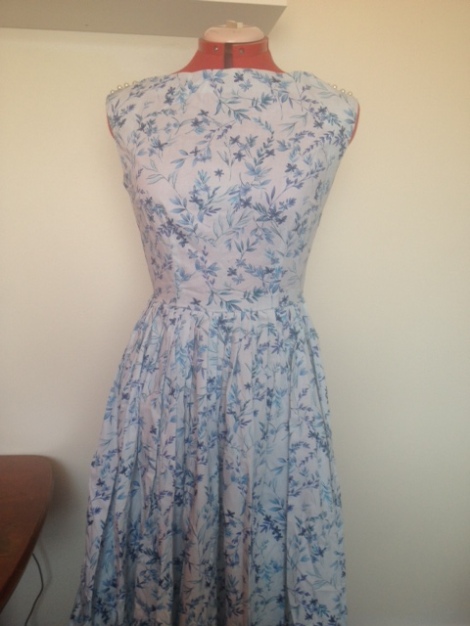
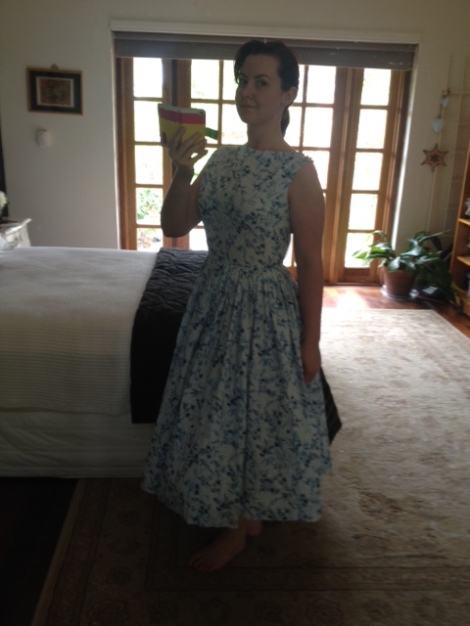
Here is the finished dress!

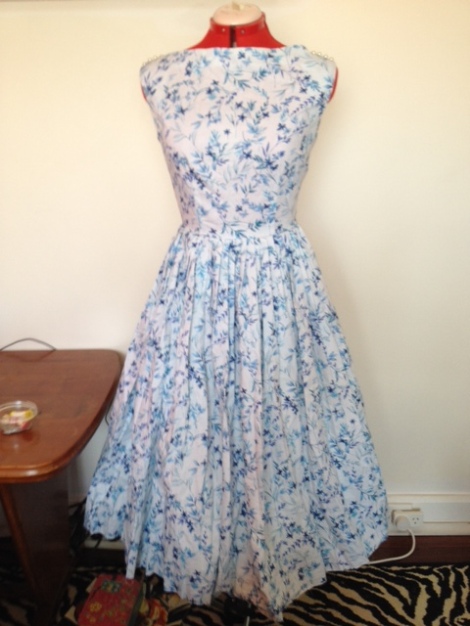
Image


Dress front

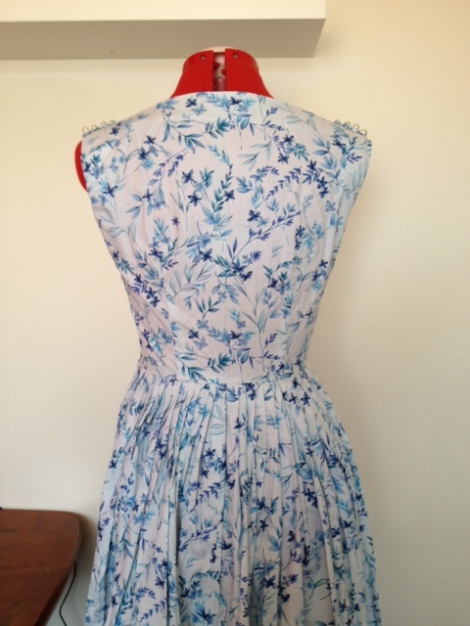
Image

Dress back

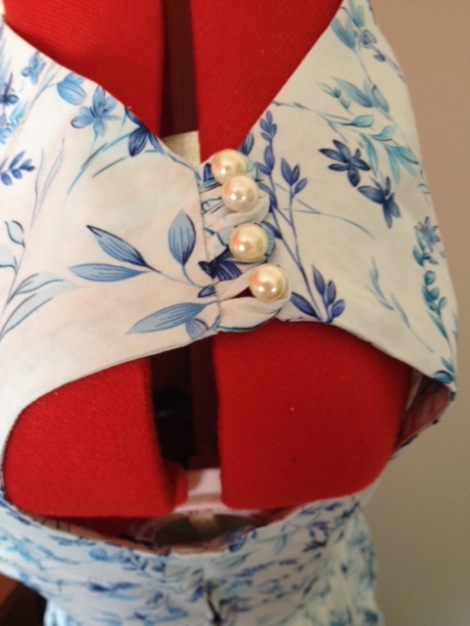
Image


Shoulder detail: pearl stud buttons

Image

Dress front – worn with a soft petticoat of 2 layers

It’s not super exciting but it looks quite lovely with a petticoat ! This is just a simple layered petticoat made from nylon organza. The pattern can be downloaded for free at http://www.burdastyle.com/projects/the-50s-petticoat

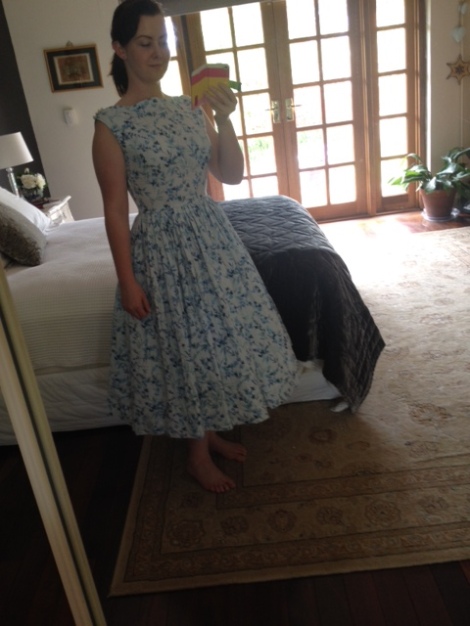
And here are a couple of not-very-well-lit action shots. It’s the only place in my house with a full-length mirror at the moment. (When I’m in Tassie after next week (!) I’m hoping to harangue my lovely partner to photograph me instead. Selfies are a bit lame and awkward… sorry.

Image

Weird downward-perspective shot 1

Image

Weird downward-perspective shot 2

The hem was only just finished and hadn’t been properly pressed in these photos – I’ll have himself take one for me at a later time. In these photos I’m wearing the same soft, two-layered chiffon petticoat over a full-length, bias-cut cotton slip (stops the annoying chiffon from getting caught between your legs when you walk and stops me from getting a rash, as I’m allergic to polyester). The skirt is a true tea-length (at the widest point of my calf), however I am rather short (5’5″), and the flare of the skirt makes it difficult to judge.

I hope you enjoyed having a look at this project. Luckily, I also have dress “A” to show to you very shortly as well!

P.S. the incredibly lovely Em of Retro Glam (http://retroglam.wordpress.com/) has agreed to send me a copy of the excellent everyday blouse and 1/2 circle skirt pattern she is currently working on. I’m thrilled and will definitely be making some sweet cotton blouses and skirts for everyday as soon as I am able! I really look forward to showing them to you in time. Please take a look at Em’s blog if you are at all interested in dressmaking techniques. At the moment she is blogging an extremely helpful series of tutorials on how to draft the blouse and skirt, including fitting the toile (with those pesky darts!). I guarantee you’ll enjoy it!

Thanks for stopping by!

R xx

NoNewSewMo update the First

Hi there!

This is just a quick note to say that I’ve been making progress on my NoNewSewMo projects however I’ve also been sick for all of today so haven’t gotten around to doing a proper post.

I have been busy doing some sewing for the past few days and I’ve managed to finish one dress, which just needs a wash and press, and get mostly through another one. Both are Vintage Vogue repro patterns and I’m excited to see how they look. Both dresses are very New Look in style, from 1956-57. 

Unfortunately, I fell into the trap of whipping up my Yellow Batiste Sundress without checking the fit using a toile. Unless you’ve made the pattern before and know your shape hasn’t changed I have to stress that making a toile is entirely worth the time and effort. Basically, I trusted the sizing on the back because I’d used patterns in the same series with no problem. I’m going to have a dress that fits far too small because this one basically lacked the ease of the other dresses I’ve made from the same series. I didn’t even measure the pattern because it’s got tucks across the front that made measuring it a bit of a buggerance. Sigh.

I’ll post pictures tomorrow to show you what I mean and if there is anyone out there with a 34″ bust and 24″ waist I’d be happy to hear from you if you’re interested in it. In the meantime I managed to find what I think is the same lemon-coloured batiste on eBay for $3m with free shipping so… I’ll just make a replacement! It’s a false economy since I spent ages mucking about with the tucks to get them right but hey, it was a learning experience (if I say it often enough then maybe it’ll be true…).

In other news I move in 10 days. Have I mentioned that I’m moving about as far across Australia as I actually can without needing a passport… in 10 days. I haven’t even confirmed my removals yet. Wups. Well I have that in hand and hopefully the men with the arms and hands will turn up next week and load my very meagre possessions onto a truck so they can make their slow progress over to Tasmania. I also have to move my horse, but thank goodness one of my close and lovely friends is heading interstate at the end of the month and can fit my girl on the float.

Well, I think I’ll finish right there on that garbled and frantic note. Proper post of postiness tomorrow when I’m home from work and feeling a bit less sick.

Good night!

R xx

NO MORE THESIS!!!!!

Hello lovelies!

Okaaaay, well, it feels like a bazillion years since I last posted. Yesterday I submitted my thesis – I’ve finally finished my degree!

I move from Perth across the country to Tasmania in 2 weeks! Despite, and a little because of that, I’m taking on “NoNewSewMo”‘. It’s one of those silly NaNoWriMo spinoffs, but the basic premise is that November becomes a month dedicated to completing projects that you’ve started, rather than starting any new ones!

…at least until I’ve finished the ones I have going.

So I have a bunch of things to finish, and I plan on getting started as early as tomorrow, if I can! Hopefully by doing that I can minimise the enormous bunch of bags and baskets of projects that I would otherwise be lugging with me. Woo!

Anyway, more updates soon! 😀

FREEDOM!

Tutorial: How to fit a perfect pencil skirt

Hi there, ladies (and maybe gents?)!

I promised a how-to following my previous post to outline the process in fitting a perfect pencil skirt, so here it is for your lovely selves. I apologise in advance for using Imperial measurements; despite living in Australia and doing Honours in the Sciences I do honestly find inches easier to deal with in respect to sewing.

Pencil skirts

*I would expect this project to take 1-3 hours, depending on your level of skill, experience and knowledge of garment construction.*

Things you will need:

  • Measuring tape;
  • Dressmaker’s mannequin and/or a good friend who doesn’t mind seeing you in your knickers, bribed with the appropriate quantity of treats and surprises;
  • Tailor’s pins;
  • Fabric shears;
  • 1m of suiting fabric (I’ve used a medium-weight wool blend in a greenish plaid; I love plaid) OR scrap fabric if you’d rather have a pattern to keep.

*N.B. To make up the finished skirt you’ll also need 1m of lining fabric, some sturdy interfacing and/or buckram/horsehair/canvas (optional), one zip as long as the measurement between your natural waist and widest part of your hips (go bigger rather than smaller), one button. I will include this list and the method for making the skirt in a subsequent post, but I’d rather not force you to make two trips to the store!*

STEP 1: Put on any structural underwear you’d plan on wearing with the skirt and take your measurements. ALL the measurements. *You can ignore this if you’re having a friend fit the skirt on you directly, but I really recommend keeping a note of your key measurements for your records.* It’s very handy to have someone else take these for you, as they’ll be more accurate and you’re less likely to strain something. There are many websites that list the kind of measurements you need if you’re not sure; just search for “dressmaking measurements” or similar. Adjust your mannequin to the correct size.

STEP 2: Fold your fabric in half and pin/press along the fold. This fold will mark the centre-front of your skirt, so make sure it’s in attractive part of the fabric, lining up any patterns.

STEP 3: Calculate the width of your front panel according to the following formula:

(0.5*widest hip measurement)+1

e.g. for myself: (0.5*37)+1 = 19½”

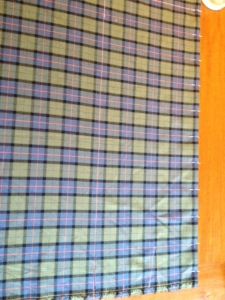
The +1 gives you your seam allowance. Mark a straight line on your fabric parallel to the fold.  I’m afraid the plaid makes it a bit hard to see, as my line actually measured right along the 4th red line from the centre (handy for me, not so much for you. Sorry!). Halfway between the fold and your line mark a small V-shaped dart, then mark the dart in the same place on the other side. Cut along your marked line.

MYO skirt 1

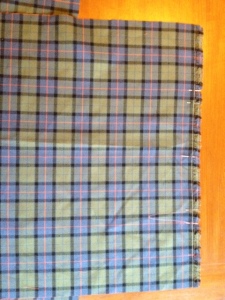
STEP 4: Pin your remaining fabric together along the selvage (waist) edge. Again, mark a line the same distance from your long edge as you calculated earlier. Mark another dart on both pieces of fabric. Cut along your marked line.

MYO skirt 2

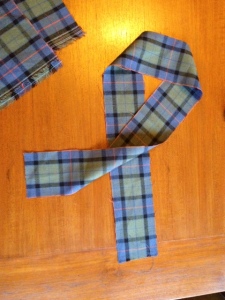
STEP 5: Cut a 3″ strip of your fabric to your waist measurement + 3″. This will become the 1″ wide waistband for your skirt. If you want a thicker waistband then cut your strip a bit wider.

MYO skirt 3

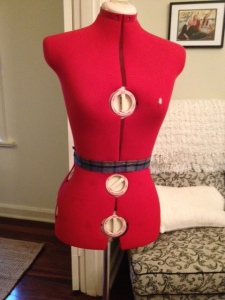
STEP 7: Celebrate! You’re halfway there – marking and cutting is always half the battle. Fold the strip in half lengthwise and pin it around your/your mannequin’s natural waist, making sure it’s level.

MYO skirt 4

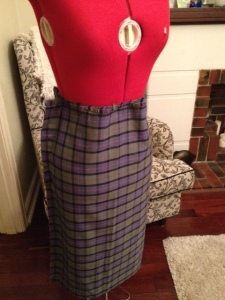
STEP 8: Pin the backs to the font at the side seams – you now have a long rectangle made of 3 pieces of fabric. Find the centre of the front and pin it to the waistband. Pull the fabric around the mannequin and pin the back seam leaving a ½” allowance again, then pin the back seam to the centre-back of the waist band. Pin the side seams to the side of the mannequin, half way between the front and back. (*See where we’re going with this? You want the pieces spaced evenly around the body with everything pinned so it hangs straight, just as if you were wearing it.*). Re-pin the side and back seams to take up some slack, following the curve of the hip in to the waist. The end result:

Plaid skirt 8

Plaid skirt 9

STEP 9: Remember those V-shaped darts you marked earlier? Pinch the top of your skirt in the middle of the V – these will become the darts that nip the skirt in at the waist. I like to mark the widest parts of the V with pins so that I can match them easily, then pinch to fit. Here are my two pins:

Plaid skirt 10

Now I pinch them so that the pins meet and pin the skirt fabric to form the dart:

Plaid skirt 11

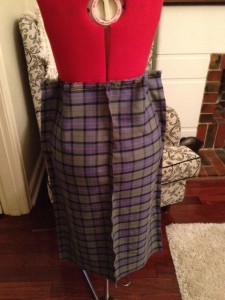
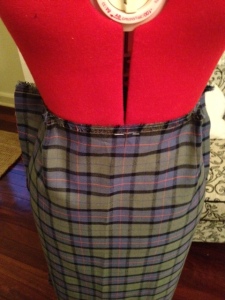
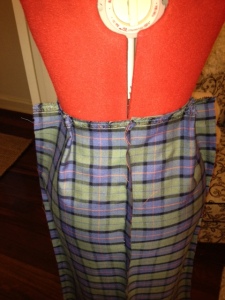
Repeat for all 4 darts, front and back, and make sure you like the way it all looks and hangs. It should be smooth and without obvious wrinkles, and the grain of your fabric  should be vertical (*Now my use of plaid makes sense, hey? Hopefully you can see that everything is smooth and the pattern is straight up and down.*). Fiddle with the side and back seams if you need to, make sure you’re happy with them. Once all of your darts are pinned it should look like this:

Plaid skirt 12

Plaid skirt 13

STEP 10: Finish the darts by pinching and pinning them down the fabric so the slack is taken up. The end result should be smooth and all of the darts should be a consistent length – measure them if you’re not sure.

Plaid skirt 14

YOU’RE DONE! Once you are satisfied, mark all of your darts and seams with chalk and then you can unpin it from the mannequin. Trim all the seam allowances to ½” along the waist where you took the side and back seams in. Keep it safe in a bag (where the chalk won’t rub off against other fabric) until you’re ready to use it.

Thank you

Thanks so much for bearing with me through my first tutorial. I would love to answer any questions you have, and would be even more glad of any feedback you’re willing to provide. Too long? Too much detail? Not enough detail? ALL THE FEEDBACKS. Please do let me know if there is anything that you’ve been wanting to make and I’ll see if I can work it into future tutorials. I love challenges! At this stage future tutorials are likely to include baby crafts for my partner’s sister and also the construction of this plaid skirt suit, and I’ll be posting about the construction of my teal silk godmother-dress.

Thank you again for taking the time to read!

♥ R

Patterns, patterns, patterns!

Welcome to the first post for my new blog! I actually didn’t expect this to happen so soon but I was inspired to do something when I had a case of writer’s block while I was meant to be working on my thesis one day last week. I had my wisdom teeth out a week ago and the combination of swollen face and painkillers wasn’t great for my productivity. Whoops <_< I often have this problem – making things is dangerously satisfying.

So, I got out my mannequin and worked through cutting out and testing four patterns I’ve been wanting to use for a while in order to work through my absurd fabric stash; a range of things from the 40s and 50s.

Late 1940s coat and dress
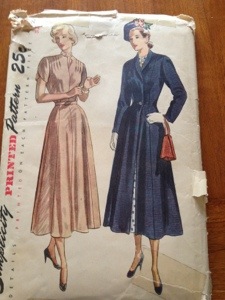
20130810-221600.jpg

This was an Etsy buy; I wanted a fitted coat that would be winter-weight for Perth and spring/autumn-weight for Tassie. I also fitted up the dress because I have plans to wear it to my godson’s Christening at the end of next month. The coat is a lightweight charcoal marle of middling quality that burn-tested like wool but I’m fairly sure it’s a wool-blend. I’ve had the fabric for about 5 years and have no idea where I bought it from. The lining is a nylon with a nice, crisp hand. I’ve pre-washed them both to avoid shrinkage drama later, and recommend that you always do the same (I generally wash everything before I add it to my stash to save time when inspiration hits).
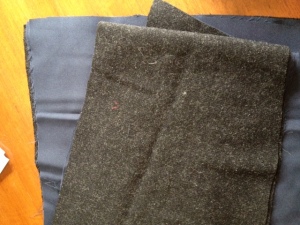
1 - grey marle

The pattern doesn’t fit me well because I bought it according to my bust measurement. I’m a little more curvy than the typical mid-century woman – the standard bust measurement that would correspond to my 25″ (1950s size 12/modern 8) waist would be about 32″, and my bust measurement is 36″ (1950s size 16/modern 12). If you’re lucky enough to fit a pattern straight-up then that’s awesome! But it’s absolutely not the end of the world if you don’t, and I think that “common sizing” actually fits a very small number of people. Just make sure you check the measurements on the envelope. I always buy to my biggest (bust or hip) measurement and then take it in where necessary.

Don’t feel bad about not being a “normal” size; wearing well-fitting clothes will always make you look and feel better than being a specific size. Just fit your clothes properly, people used to do it for a reason.

So, I somewhat foolishly forgot to take photos of fitting the coat. Bugger, sorry about that. I’m prepared to blame it on the painkillers! As it turned out the pattern for the coat was quite large! I had to take it in pretty severely, even at the bust. Not to worry, a dressmaker’s mannequin is worth its weight in gold if you like to sew and aren’t a typical size. If you can’t afford one and don’t have one to borrow then pre-cut the pattern and find someone who will take it in while you’re wearing it. Get together with a friend and practice tailoring something on each other! Remember not to make it too tight – it should have the same amount of room in it as you will need once it’s made up.

*Alternatively, you can have someone make a toile  for you. A toile is a pattern of your body, and is the first thing a tailor will fit to you if you have something custom-made. It’s ususally made of calico but using distinctive scrap fabric made from natural fibre like cotton or linen will make it harder to lose (trust me!) You can then pre-cut the too-big pattern and lay your toile pieces over the pattern pieces, matching the critical shoulder points and waistline, etc. Then trim  the pattern pieces down accordingly, remembering to leave enough room for comfort and seam allowance. Pin your shaped pieces together and try it on (inside-out) to make sure you’re happy with the fit. Tweak as necessary.*

So, after the coat I patterned the dress. Strangely, the dress was a much better fit than the coat though I can’t account for why since they came from the same envelope. I butchered an old, poorly-made and much too large 16th century Florentine gown of lightweight teal silk for this dress. It’s lovely fabric and it was wasted on the old costume. The skirt had about 6m of silk in it, and I only used about 4 in the end, so I’ll probably be able to make a nice blouse or line a jacket from the remnant at some point.

I marked all of the tucks with a stitch using a needle and thread when I cut the pattern out. You can mark with chalk if you prefer but I like to use thread because it doesn’t rub off when you’re handling the fabric, and it works on fabrics with nap and patterns, too, I pinned all of the tucks before I put the pieces together. Here’s the front:
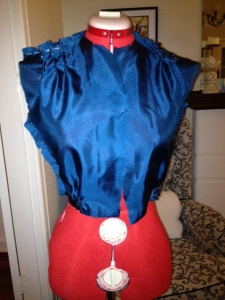
2 - teal silk

And here’s the back:

3 - teal silk

I’m happy that the bottom of the bodice sits on my natural waistline and I love the soft bloused effect that the very lightweight silk gives. It’s going to be so comfortable for the Christening in warm and humid Brisbane! Because the bodice fits well with minimal adjustment (you can see I took it in only a little at the waist), I haven’t worried about fitting the skirt pieces. I’ll just check everything matches when I’m sewing it up.

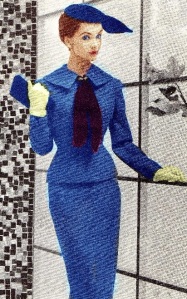
Mid-1950s suit.
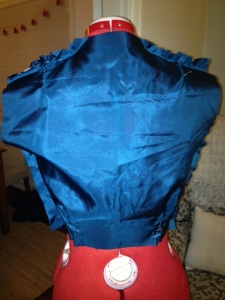
4 - candy suit

This is a pattern I also bought from Etsy, but as a .pdf. You’re meant to scale the pattern up using a measuring tape but the first time I tried it at the start of the year it was a disaster. If I didn’t like the look of it so much I’d have given up AGES ago. I scaled up the pieces according to my measurements and it just came out way too small. Even with plenty of seam allowance I could barely pin it in the mannequin so I decided to give up and I’ve only just gotten over my irritation enough to give it another go.

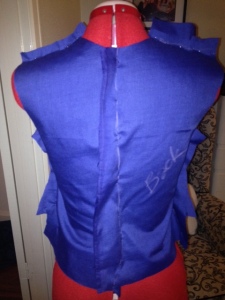
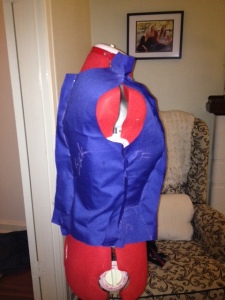
I got my scaled-up pieces and traced them onto some fresh fabric with about 2 1/2″ of allowance. Then I cut them out and pinned them on to my mannequin, shuffled them, took them in all over, unpinned, repinned and eventually was as happy as I could be with it. Note that I’m only keeping the panels with labels on them and seams marked – I’ll duplicate the pieces when I cut them out. Here’s the result.

Front:
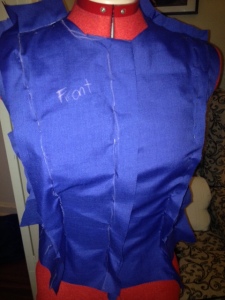
5 - candy suit

Back:

7 - candy suit

Side:

6 - candy suit

As you can see, it’s still not great. I’ve since decided that the pattern is absolute crap and I’m going to redraft it to my satisfaction using completely different pieces. To give that real curved shape to the bodice below the waist the jacket really needs gores/godets. It’s a crap pattern. Crap. Grrr. Re-patterning to follow.

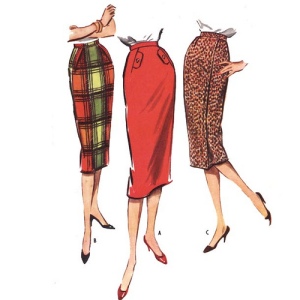
Late 1950s pencil skirt and bonus cropped box jacket (MADE FROM 1m OF FABRIC!!!)

Okay, I think I’ve saved the best for last because I’m SO impressed that I manage to squeeze a jacket out of such a small amount of fabric as well as the pencil skirt I’d originally planned. I got the idea from seeing a 50s pattern for a “1yd skirt”, i.e. a slim-fitting skirt made from a single yard of fabric. Because my fabric was reasonably wide (50″) I managed to squeeze a cropped box jacket from what was left over by piecing the sleeves very carefully. WINNAH!

I’m going to make a separate post on “How to fit a pencil skirt”. It’s really easy and everyone should do it – buying a pencil skirt from the shop is bloody impossible for almost everyone as they depend so much on not just the circumference of your waist and hips, but their respective ratios and the distance between them, too. My hip measurement is taken very low because I have a bottom that is widest at my thighs, but the hips of a 12-year-old boy. However, when you pattern your own it doesn’t even matter one bit.

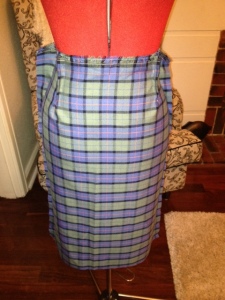
Here’s the finished skirt:
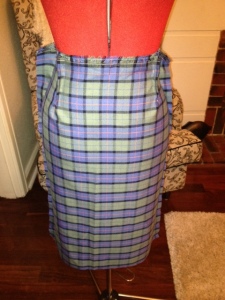
8 - plaid pencil skirt

Unfortunately I don’t have the picture of the jacket with me, but I will include them in a supplementary post. This one has been a few days in the writing and I want to get it off my list of distractions!

I really hope you’ve enjoyed this post. If you have any questions at all please feel free to leave a comment or send a message. I’d love to answer them.

~R xx
Post the first!

Hi there!

For those of you who don’t know, this is my second blog. My first, which you can find at elinorcliffordtailor.blogspot.com, relates to my historical costuming hobby.

A few friends have asked me about posting some of my retro and vintage exploits on my blog. I don’t have a lot of time at the moment to devote to historical recreation, but I’ve found time to pick up the odd vintage piece. Since vintage is much more a part of my daily style and something I really enjoy incorporating into fashion and furnishings I thought it might be more fun to create a new place to record my crafty funtimes.

For the remainder of the year, while I finish up my Honours, I won’t expect to be updating terribly often. After I finish and move to Tasmania in November I’m looking forward to having free time to devote to making clothes, furnishings and crafts. I will be making-over the tiny one-bedroom cottage that is home to my partner Ian and myself, and a part-time home to his daughter Johanna, into a cozy and comfortable place. Hopefully you can expect vintage crafts (I’ll need throws, cushion covers and I’m desperate to have a knitted tea cozy) as well as details of my home-made, retro-inspired wardrobe.

Ideas and requests are more than welcome. I hope this turns out as well as I hope it will!